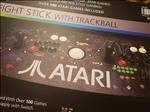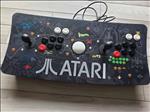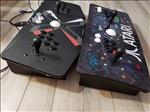
Microcenter Atari Ultimate Dual Arcade Fight Stick with Trackball
A long time ago, I got my first arcade fight stick to review in the X-Arcade Dual Joystick. Having grown up in arcades, I loved how it was all built and ready to go for me to use on my computer to play some old games with. A month ago, I was browsing Microcenter’s website and the Atari Ultimate Dual Arcade Fight Stick with Trackball caught my attention. It looked similar to my X-Arcade Tankstick and I was in the market for another arcade setup that was portable. By portable I mean the setup housing a Raspberry Pi inside the housing, so all I'd need to do is take it someplace with a TV and plug it in for us to play some classic games.
So after procrastinating and seeing Microcenter sell out of the Trackball version of the stick, I was finally able to pick one up and put it through its paces. I was able to procure one on sale for $119 before taxes and that included the unit installed with a Raspberry Pi 3+, an HDMI cable, and a power supply with push button switch.

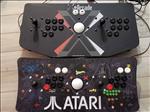
Let’s start with the construction and the shell of the control panel. It’s a very solid unit that feels like it can take a beating. Compared to the Tankstick, the Atari Ultimate Dual Arcade Fight stick is about the same width, height, and depth but a little bit heavier. That makes sense considering what’s on the inside of the Atari stick. But let’s not get ahead of ourselves.
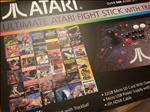
We’re graced with a heavy stock printed decal that depicts some of Atari’s classic games. The design is something that some might say is a little busy and it’s surely a lot busier than the Tankstick. One difference I see on mine compared to the earlier production ones is there’s no Microcenter logo on the bottom right corner. Instead we just have the Atari logo on the bottom with various game icons spread around the top. If you were around when the Atari arcade games and 2600 were popular, it’s a nice bit of nostalgia.

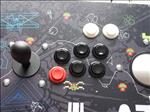
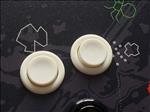
The button layout is a six button layout curved a little up and to the right, unlike the Tankstick’s horizontal Street Fighter II like layout. It’s made to naturally fit the curve of your fingers to allow for less reach needed for some of the buttons and, again, this is just a matter of preference whether you prefer it this way or a straight line. I’m good with either.
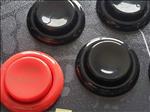
Another difference from the original batch I saw is one of the buttons is red. Nothing too significant but you can program this as the main action button for your games. Otherwise, it’s just an aesthetic design that doesn’t affect the function of the button.

Above each player’s buttons are two more white buttons that can be used for coin insert and start. They are blank, but I’m going to look at grabbing some stickers to put on there to make them show what functions they are mapped to.
Missing for me are two side buttons for pinball. The Tankstick has two on each side, but I would’ve liked to have seen at least one. Now, the USB encoder that the Atari stick uses has more than enough pins for additional buttons so adding your own should be a snap. With a long list of updates I want to do to this, this will be one of the first.

All of the buttons feel solid and have a nice click to them. I think they are Happ clones and with a concave surface. They snap back pretty quickly with little effort for actuation. I’ve used sticks with subpar-feeling buttons, but the Atari Fightstick has some good-feeling clones.
Moving to the joystick, the bat top joysticks have a nice clicky feel when moving to a direction with the microswitches giving great feedback when actuated. There are no restrictor plates on these so you can’t set them to 4- or 8-way operations. From the looks, they are of solid construction and seem pretty responsive. I didn’t have any issues pulling off moves in games like Street Fighter II or Killer Instinct when playing on the PC. A minor, and very minor nitpick, is that you see the mounting points on the top of the panel. I would’ve preferred the cleaner look of having no visible mounting on the top but rather having it all be done underneath inside the Fight Stick. Again, that’s a minor complaint of me looking for a nice cleaner look.

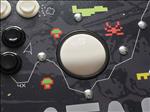
An oversized trackball provides a nice option for many of the included Atari games as the controller of choice. Many of the older Atari games such as football, basketball, Crystal Castles, and Centipede used the trackball as its primary controller and the Atari Fightstick’s trackball feels really, really solid. It’s got a nice roll to it and good traction to where it’s not too loose or too tight. Also, Missile Command can go to hell. That game is just a bundle of frustration for me no matter what type of controller I use.
Now, one of the best things about this control deck is the ability to just lift the top up to get easy access to the internals. A really great feature are two gas struts that make opening the top nice and smooth and keep the top open. This makes working inside a breeze and I wish more control panels had this. You can lock the top so it can’t be open with a key if you so desire.

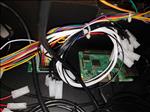
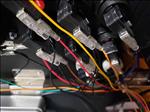
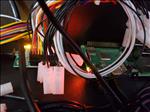
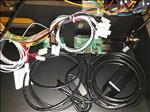
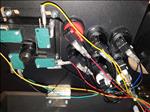
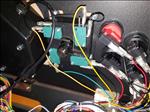
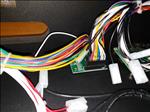
The wiring for the buttons and stick are very well done with nicely color coded wires to the Xin-Mo two player controller. The setup doesn’t use all the buttons, but they are all pre-wired and ready to go should you want to add buttons yourself, another nice touch. The folks did a pretty neat job in tying them up although I would’ve liked to see some more colors on the unused buttons that were wired up to trace them back to the board a little easier. All the unused buttons have the same color wiring for one player and a different same color wiring for the second player.
There’s some tight spacing though with one of the wires to the left side of the player one joystick and one of the gas struts. It’s very, very close to contacting it where I thought it might pry the gold left contact a little loose when raising and lowering the top. So far, it seems OK, but something to maybe keep an eye on.

Everything is easily swappable so if you don’t like the feel of a button or joystick, just remove and replace. It’s really simple and even I didn’t feel overwhelmed by the thought of doing it once I took a little time to do some research. In its current state, it’s great to use, but having easy to replace parts makes it much more desirable in not only the ability to repair broken parts but to upgrade them as well.
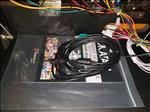
If you purchase one with an included Raspberry Pi 3B+, it’ll be preinstalled on the top right of the base. On mine, only the Xim-Mo cable was connected to the Pi so I had to plug in the trackball’s USB plug, HDMI cable, and power supply to finish the setup. There’s a nice cutout on the back of the control panel where you can route the power cable and HDMI cable out as well as any of the USB cables should you want to use this control deck on say a PC or another external Raspberry Pi. I think I would’ve liked the location of the Pi closer to you inside as the USB ports also butt up next to the right gas strut making plugging in the USB cables a small nuisance. There are some nice stand offs there that you could take off and relocate the Pie if you so desire.

Included is a 32GB microSD card where when you turn it on for the first time, it will auto download a RetroPie configuration with the included 100+ Atari games ranging from the arcade, Atari 2600, Atari 5200, and Atari 7800. You don’t have to plug in a keyboard to set it up as you can use the trackball as a mouse and pop open a virtual keyboard when typing in your WiFi credentials.
Installation of the image took about 20 minutes and will be dependent on your Internet speed, but everything installed without a hitch and I was presented with a RetroPie UI with the games installed and menu of the systems available. I wish Microcenter went the extra mile in setting up the buttons for the games because you’ll probably have to spend some time doing it yourself initially.

The trackball is way off on a lot of the games in terms of sensitivity so that’s a little chore you’ll have to do when you first load them up. The button configurations are OK, but it was the trackball that gave me the most problems. It wasn’t until I finagled with the settings that made games like Centipede and Crystal Castles feel more in line with the arcade, but I feel with Microcenter producing this image, they should have taken the time to do the adjustments on their end rather than leaving it to the end user.
The RetroPie image does allow for putting in your own games so you aren’t stuck with what's provided. There are plenty of them out there to use, and with access to the internals, you can even upgrade the Pie to a Raspberry Pie 4 if you wish. So you could really customize the setup to however you like and have all that you need to play inside.

That’s one of the big selling points for me as this mimics a Pandora’s Box control deck with everything all encased inside the shell letting you take it anywhere you want and just plugging it into a TV to use. And with room for customization, the Atari Fight Stick with Trackball gives modders a lot to work with.
It’s priced really well, has solid parts, room to grow, and great accessibility to the internals, the Atari Ultimate Dual Arcade Fight Stick with Trackball is a solid buy for those looking for an easy pre-built control deck that they can plug into a TV and go. I like the layout and setup and the ability to just expand the functionality at my leisure. You can also plug it into a computer and use the controllers as is with PC games or other emulators. I was really surprised at how well the Fight Stick was constructed and it has great value in what it has to offer making this one of the better products out there for retro gaming.

An awesome value, the Atari Ultimate Fight Stick with Trackball from Microcenter offers good controls and solid construction with easy to access internals and a gas strut supported top.
Rating: 9 Class Leading

About Author
I've been reviewing products since 1997 and started out at Gaming Nexus. As one of the original writers, I was tapped to do action games and hardware. Nowadays, I work with a great group of folks on here to bring to you news and reviews on all things PC and consoles.
As for what I enjoy, I love action and survival games. I'm more of a PC gamer now than I used to be, but still enjoy the occasional console fair. Lately, I've been really playing a ton of retro games after building an arcade cabinet for myself and the kids. There's some old games I love to revisit and the cabinet really does a great job at bringing back that nostalgic feeling of going to the arcade.
View Profile